Friday, November 30, 2012

Matisse Still Lives

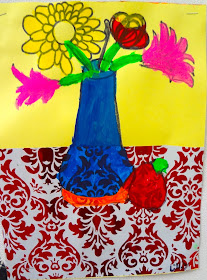
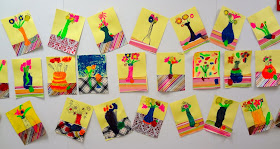
It's the end of November already and that means posting about this month's art lessons!  Here is the lesson I did with 3rd grade. (Look for more posts to come about my 2nd and 1st grade projects!) Read on if you'd like step-by-step instructions for this lesson. 

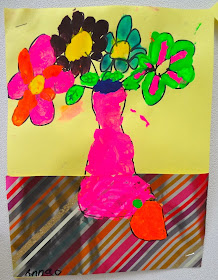
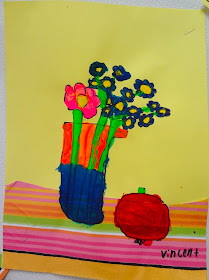
MATISSE STILL LIFE
1.) Introduce Matisse to the students. Show a short slideshow of his still lives. Ask kids what they noticed. What was similar about all these/how do we know it's the same artist? Make sure they notice: color palette, texture and patten elements, the thick black outlines in a lot of his work. 

2.) Set up still lives on each table. I used silk flowers in vases and fake fruit. Talk about how still lives were studies of composition, how an artist arranges objects on a page. 

3.) Hand out small sections of cut wrapping paper and have kids glue them down and cut off access to make their "tables".

4.) Kids draw still lives in thick black sharpies.

5.) When they're ready to paint, they can use tempera. (I use those little white round kids palettes with the wells all the way around.)
matisse still life art project for kids

matisse still life art project for kids

matisse still life art project for kids

matisse still life art project for kids

Thursday, November 29, 2012

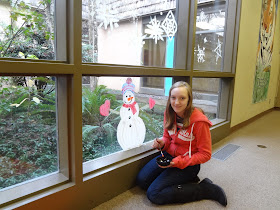
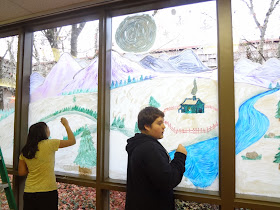
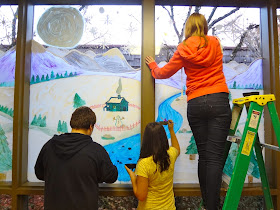
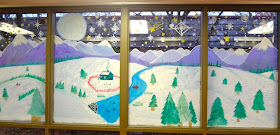
Winter Wonderland Window! (say that 10 times fast)

I just spent three days with a few artistic youngsters at Oaklea Middle School in Junction City, making this window painting!  Oaklea's after school coordinator asked me to come out and help the kids get their courtyard windows all dressed up for the season.  I worked at Oaklea last spring, making a big jungle-y mural near their gym.  For this project, the program coordinator chose 5 students who were the most dedicated and serious about the work we did last year.  These select few kiddos and I made this window mural!

Man, is window painting a different animal than regular mural-ing! The paint looks so different when it's got light shining through the back of it! Every brush stroke really shows up. The whole thing changed so much too as the sun went down since we were working from 3pm to 5pm!

The main concept I introduced to the kids for this project, was simple perspective.  As objects get further away from you, they get smaller and lighter in color.  Without further prompting from me, the kids remembered this concept as they painted their trees and mountains.  Proud art teacher!

Overall a good, new experience for me and the kids.  Hope to go back to re-haul these windows again for the spring! I'm seeing fields of spring flowers..... :)
winter window painting with kids

winter window painting with kids

winter window painting with kids

winter window painting with kids

winter window painting with kids

winter window painting with kids

winter window painting with kids

Friday, November 9, 2012

Rice Gluing Adventure!

Madagascar mural project mini update:

I made some glue out of just cooked rice and boiling water. Then I went to the local graffiti wall and pasted up samples from 2 different mural fabrics: one thicker, one thinner.  Both fabric samples were painted with the paints we will use here in the U.S., and the oil paint that will be used once the mural is in Madagascar. Guess what? The glue worked amazing and adhered both samples to the wall! I think after this experiment, I decided I like the thinner fabric better...easier to put up and felt like it would stick better. 

(For other muralists: this is the Pellon 830 fabric. It's actually called "Easy Pattern" and used for pattern making. You can buy it at pellon.com . It's also pretty affordable and comes in small amounts (the other fabric only comes 250 yards at a time!)

Also, I'm going to silkscreen some of these designs on t-shirts to help me fundraise for this project and future ones. I'm so excited that this is happening!!!!!!! If you want to see what project I'm talking about,  read this. Yay!


Thursday, November 8, 2012

October Art Lessons

I've decided to start blogging about the art lessons I'm doing with my students every month.  I teach 2nd and 3rd, and have recently added 1st grade as well.  I love to read other art teacher blogs, and thought I would add myself into the mix.  Maybe I can inspire a few other teachers out there! So look for lesson posts at the end of every month for some more ideas this year.  Hope you enjoy!

__________________________________________________________

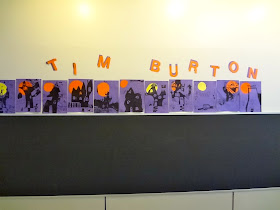
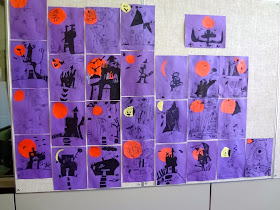
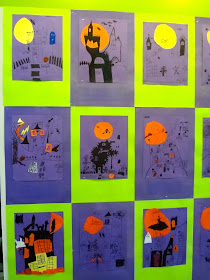
TIM BURTON HAUNTED HOUSES
Tim Burton Haunted House kids art project

For my 3rd grade October lesson, we did haunted houses inspired by the art and movies of TIM BURTON! If you'd like to try this lesson, read on!

here's what you will need:
- yellow, purple and orange construction paper
- thin and thick line black pens (sharpies work well, just make sure to put scrap paper underneath kid's work areas... sharpies can bleed through and stain desks!)
- glue sticks
- (optional) a "Principles and Elements of Art" poster
Prep: 
- Cut yellow and orange sheets in half. Students only need half a sheet of one of these colors or their choice. 
Lesson:
- Introduce the principles and elements poster and explain that for each lesson, we will be learning about another principle or element of art.
- Introduce Tim Burton and give a super short bio (wikipedia him!).
-Show slideshow of a few Tim Burton character designs, art and scenes from his movies. Ask students to be thinking about what makes his art look like his art, but hold their comments till the end.
- Ask students what they observed during the slideshow.
- Go back to principles/elements poster and explain how Tim Burton uses "Positive and Negative Space".
Project:
- Talk with students about what makes a house look haunted. (Ex.: pointy shapes, tall and skinny house, ghosts, old and broken looking, etc.)
- Students cut out moon shapes out of their half sheets of orange or yellow paper and glue to the top of their purple sheets.
- Sketch their houses in pencil first
- Small details in skinny black pens, use thicker sharpies to fill in larger areas.
Tim Burton Haunted House kids art project

FOLK ART BLACK CATS
Folk Art Kids Art Lesson
For my 2nd grade October lesson, we did black cats inspired by FOLK ART! If you'd like to try this lesson, read on!

Here's what you will need:
- White paper
- Oil pastels
- Watercolors
Lesson:
- Introduce concept of Folk Art.  (Art that is usually made by indigenous cultures. Rather than “fine art” (art that goes in galleries) It is usually on useful items or for decoration (baskets, on pots, etc.). Usually they are not trying to make things look “real”.)
- Show slideshow of examples of Folk Art from around the world. Ask students to hold their comments till the end.
- Ask students what they observed during the slideshow.
Project:
- Tell students that there are a few rules for this project:
#1 They must draw a border on their pieces.
#2 They must draw the cat inside that border as big as they can fit it.
- Students draw in oil pastels, without coloring everything in.
- Paint over drawings with watercolors.
Folk Art Kids Art Lesson