Tuesday, December 11, 2012

Madagascar Mural Collaboration Residency: Days 1-3

Well, it's FINALLY HAPPENING!!!  After coming up with the idea in August, sending many emails back and forth between continents, researching materials, planning lessons, talking to school administrators and teachers and getting a grant funded to pay me for teaching time, I FINALLY got to do my Madagascar Mural Collaboration art residency! 

In case you missed previous blogs about this, click here to read about the forming of the idea, or read the rest of this paragraph.  This all started last Summer, when I did an internship with the Mural Arts Program in Philadelphia.  There, I learned that you can paint on a specialized fabric and then install it on any wall you want.  I have been working in schools doing residencies that involve painting murals permanently on the school wall(s).  But after learning this new technique, I had the idea to have my students paint a mural on this special fabric then ship it to Madagascar (where I was a Peace Corps Volunteer 2008-2010) to be installed.  There has been a recent push for Peace Corps Volunteers to organize the painting of murals in their villages that double as public art and health teaching tools around the subject of Malaria prevention.  The mural I am having the students paint is based on care and proper use of mosquito nets (a form of Malaria prevention).  When it arrives, a current Peace Corps Volunteer will install this mural on the wall of the hospital in their village.  There is text on the mural explaining the pictures, but the pictures are really important because of the high illiteracy rates in the rural village.  We left some pieces of the mural unfinished, so that the villagers who will eventually have it on their hospital, can finish it.  This makes the project a collaborative mural between American and Malagasy people.    

This Madagascar art residency was done with almost 90 4th graders at Holt Elementary School over the last 7 days.  During this week, we have been studying Madagascar, doing art lessons related to the country's flora/fauna, and working on the mural.  

Before beginning the residency, I showed kids a little slideshow with some basic facts about Madagascar, and some pictures I took while I was there....followed by a long Q&A session with the kids.  I got, "How do they go to the bathroom?" "What was the weirdest thing you ate there?" "Were you scared all the time?" etc. 

The first day, we made "passports".  These were just little blue and white construction paper booklets that acted as the kid's journals for the residency.  Every new fact, and every new Malagasy word they learned, got written in their passports.  They even drew eagles on the front, and filled out their info on an inside page, complete with tiny self-portrait "passport photos".  Super cute. 

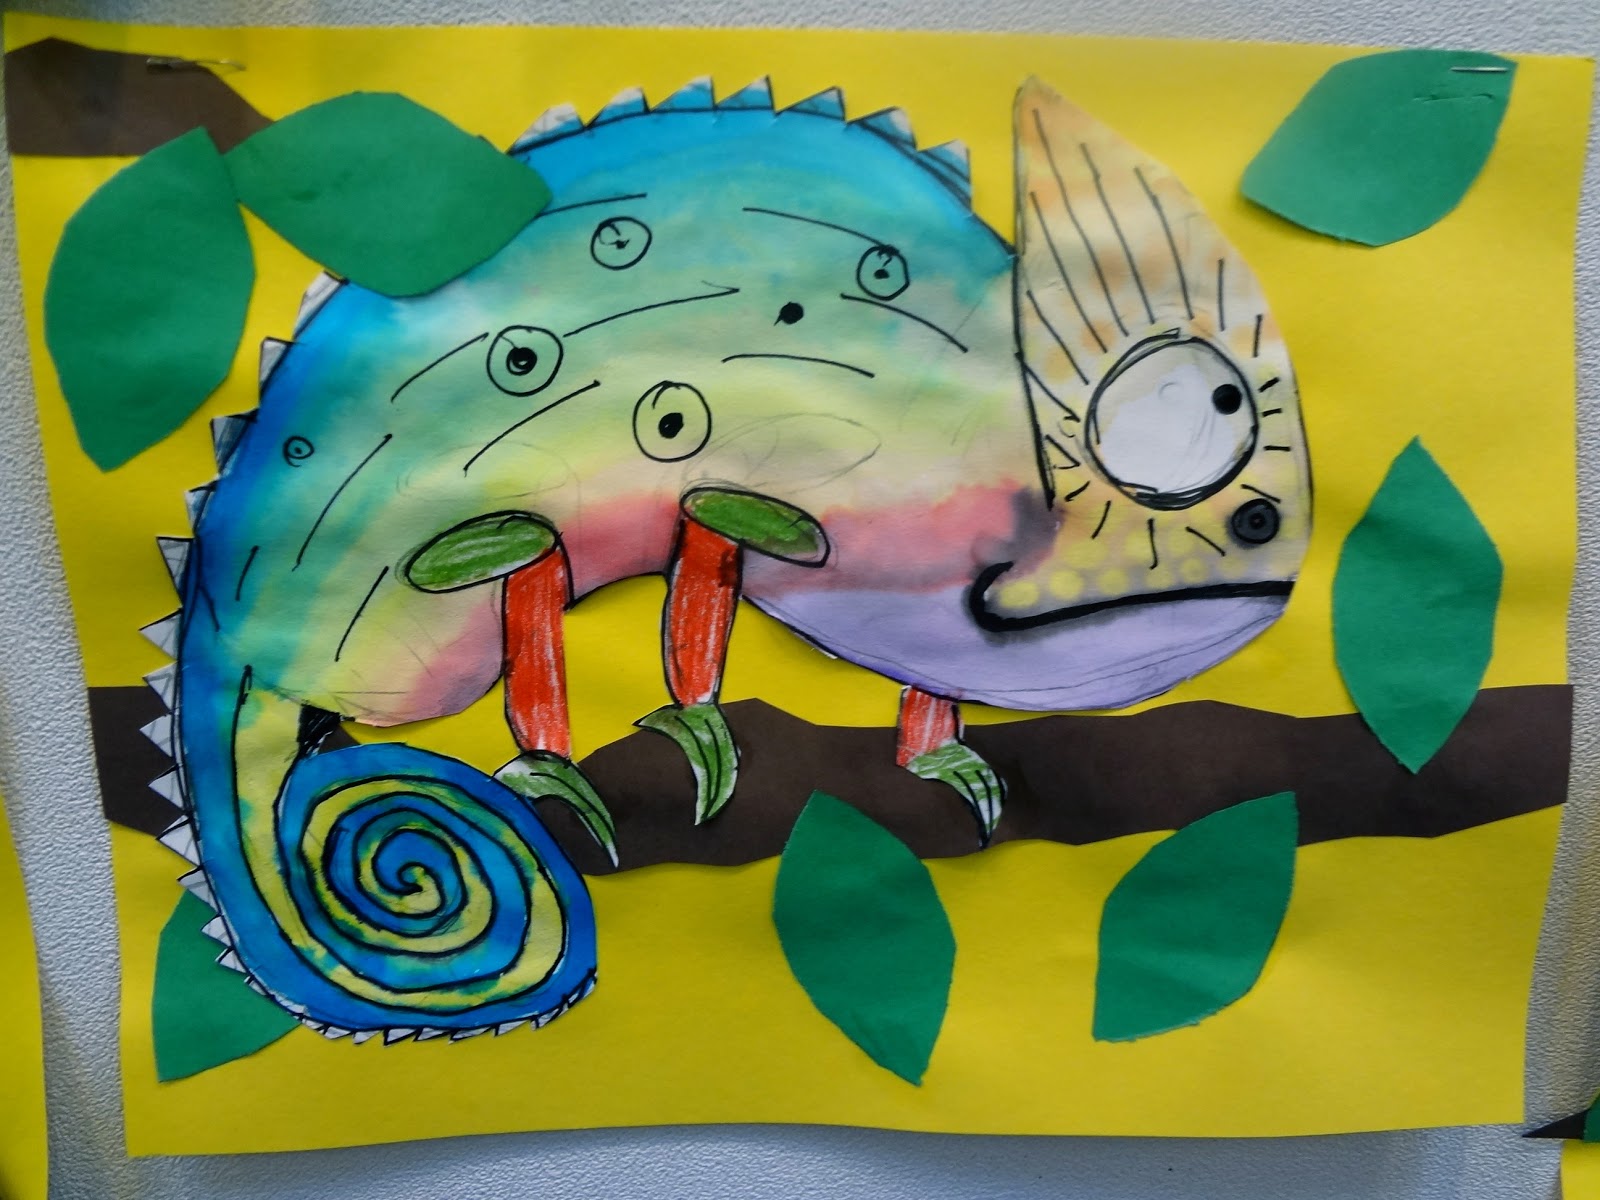
The first 3 days of the residency, after making the passports, we did an art project about chameleons.  All kids worked on their chameleons in the classroom, while I periodically pulled a few kids aside to work on the mural.  If you want to learn how to do the chameleons lesson with your kids or students, read on! 

CHAMELEONS LESSON:

You need:
-watercolor sets and brushes
-yellow construction paper, brown strips of paper, half sheets of green paper
-skinny black "Teacher Pens" as the kids call them. (Felt tip markers)

Day 1:
(The first day, we spent half the class making passports, so this part and the Day 2 step may actually be combined).  This day, we did a step-by-step follow along drawing of a chameleon in pencil on white paper. The kids draw, as you draw. Show them how to make a "jelly bean" shaped body, then add a triangle head, legs, back spikes, etc.

Day 2:
This day, break out the watercolors, and have the kids paint those suckers. Show some pics of real chameleons to get them inspired by their colors, patterns, etc.  These have to dry overnight.

Day 3:
Outline and draw designs on them with the felt tip pens.  Cut out the chameleons.  Use the brown strips and green half sheets to make leaves and branches.  Have them arrange everything on the yellow backgrounds, and paste down.  Remind them that it will help make things look more dimensional if they overlap a few leaves on top of their chameleons.  Done and DONE!  So cute, right?!
Chameleons kids art project

Chameleons kids art project

Chameleons kids art project

Chameleons kids art project

Chameleons kids art project

Chameleons kids art project

Chameleons kids art project

Chameleons kids art project

Chameleons kids art project

Chameleons kids art project

Chameleons kids art project

Chameleons kids art project

Thanks for reading, and check back soon for the rest of the week's Madagascar projects!

Corie

Sunday, December 2, 2012

Van Gogh's "Starry Night"....2nd grader style!

November lessons continued: Van Gogh's "Starry Night" with 2nd grade 

This is probably my favorite lesson from November, and one of my top favs for the lower grades. The kids loved it and I think they turned out adorable and beautiful! I combined a couple different things I saw on Pinterest for this lesson plan. If you want to know exactly how to do my version of this lesson, read on!

Materials:
• 11 x 17 white construction paper
• blue, purple and yellow tempera paints and brushes
• black and yellow construction paper

1.) Talk to the kids about Van Gogh. Make a point that he only ever sold like ONE painting in his lifetime....to his brother! Now his paintings are worth millions. Kids get a kick out of that. You can emphasize that they should try not to be discouraged, and that if they're doing what they love, it will be worth it all. I dunno, I thought this was a good life lesson somehow, even if it's a sort of depressing fact about Van Gogh's struggle of a life. 

2.) Show some of Van Gogh's paintings and end with "Starry Night". Have kids describe it. Make sure you emphasize his short, numerous brush strokes or "dots" of color - he didn't blend, just placed colors next to each other. This will be the important part to talk about, since it's what the kids are about to do.

3.) Give kids blue, purple and yellow tempera paints in those little white plastic palettes. 1 per table group works fine. 

4.) Do this as a "follow along" painting. Under the document camera, paint along with the kids. First tell everyone to do yellow stars and moons in their sky. Follow that with painting blue swirls around them (but not blending into the stars, that would make a green mess, PLUS, explain again that Van Gogh only placed colors next to each other without blending). Then, fill in all the extra spaces with the purple, using short, small brush strokes like Van Gogh. Leading the kids through this painting process will make their skies turn out better, and they will all look completely different anyways. :)

5.) NEXT DAY: After their skies have dried, hand out sheets of black and half sheets (or smaller) of yellow paper. Show "Starry Night" again and show how there's some trees and some city in there. Have kids make half trees and half buildings with their black. Then they can cut out yellow windows to add to their buildings or houses. Glue it all to the backgrounds. Done!! 

LESSON AFTERTHOUGHT: After each lesson, I learn a lot and sometimes have new ideas for how I would do the same lesson the next time. I think this lesson could work REALLY well if done with oil or chalk pastels on dark blue paper. Wouldn't that be gorgeous? Plus, you wouldn't have to wait till the next day to finish, since there's no drying time! Must try that next time!!

Talking Walls art with kids: Starry Night for 2nd grade

Talking Walls art with kids: Starry Night for 2nd grade

Talking Walls art with kids: Starry Night for 2nd grade

Talking Walls art with kids: Starry Night for 2nd grade

Talking Walls art with kids: Starry Night for 2nd grade

Talking Walls art with kids: Starry Night for 2nd grade

Talking Walls art with kids: Starry Night for 2nd grade

Talking Walls art with kids: Starry Night for 2nd grade


Friday, November 30, 2012

Matisse Still Lives

It's the end of November already and that means posting about this month's art lessons!  Here is the lesson I did with 3rd grade. (Look for more posts to come about my 2nd and 1st grade projects!) Read on if you'd like step-by-step instructions for this lesson. 

MATISSE STILL LIFE
1.) Introduce Matisse to the students. Show a short slideshow of his still lives. Ask kids what they noticed. What was similar about all these/how do we know it's the same artist? Make sure they notice: color palette, texture and patten elements, the thick black outlines in a lot of his work. 

2.) Set up still lives on each table. I used silk flowers in vases and fake fruit. Talk about how still lives were studies of composition, how an artist arranges objects on a page. 

3.) Hand out small sections of cut wrapping paper and have kids glue them down and cut off access to make their "tables".

4.) Kids draw still lives in thick black sharpies.

5.) When they're ready to paint, they can use tempera. (I use those little white round kids palettes with the wells all the way around.)
matisse still life art project for kids

matisse still life art project for kids

matisse still life art project for kids

matisse still life art project for kids

Thursday, November 29, 2012

Winter Wonderland Window! (say that 10 times fast)

I just spent three days with a few artistic youngsters at Oaklea Middle School in Junction City, making this window painting!  Oaklea's after school coordinator asked me to come out and help the kids get their courtyard windows all dressed up for the season.  I worked at Oaklea last spring, making a big jungle-y mural near their gym.  For this project, the program coordinator chose 5 students who were the most dedicated and serious about the work we did last year.  These select few kiddos and I made this window mural!

Man, is window painting a different animal than regular mural-ing! The paint looks so different when it's got light shining through the back of it! Every brush stroke really shows up. The whole thing changed so much too as the sun went down since we were working from 3pm to 5pm!

The main concept I introduced to the kids for this project, was simple perspective.  As objects get further away from you, they get smaller and lighter in color.  Without further prompting from me, the kids remembered this concept as they painted their trees and mountains.  Proud art teacher!

Overall a good, new experience for me and the kids.  Hope to go back to re-haul these windows again for the spring! I'm seeing fields of spring flowers..... :)
winter window painting with kids

winter window painting with kids

winter window painting with kids

winter window painting with kids

winter window painting with kids

winter window painting with kids

winter window painting with kids

Friday, November 9, 2012

Rice Gluing Adventure!

Madagascar mural project mini update:

I made some glue out of just cooked rice and boiling water. Then I went to the local graffiti wall and pasted up samples from 2 different mural fabrics: one thicker, one thinner.  Both fabric samples were painted with the paints we will use here in the U.S., and the oil paint that will be used once the mural is in Madagascar. Guess what? The glue worked amazing and adhered both samples to the wall! I think after this experiment, I decided I like the thinner fabric better...easier to put up and felt like it would stick better. 

(For other muralists: this is the Pellon 830 fabric. It's actually called "Easy Pattern" and used for pattern making. You can buy it at pellon.com . It's also pretty affordable and comes in small amounts (the other fabric only comes 250 yards at a time!)

Also, I'm going to silkscreen some of these designs on t-shirts to help me fundraise for this project and future ones. I'm so excited that this is happening!!!!!!! If you want to see what project I'm talking about,  read this. Yay!


Thursday, November 8, 2012

October Art Lessons

I've decided to start blogging about the art lessons I'm doing with my students every month.  I teach 2nd and 3rd, and have recently added 1st grade as well.  I love to read other art teacher blogs, and thought I would add myself into the mix.  Maybe I can inspire a few other teachers out there! So look for lesson posts at the end of every month for some more ideas this year.  Hope you enjoy!

__________________________________________________________

TIM BURTON HAUNTED HOUSES
Tim Burton Haunted House kids art project

For my 3rd grade October lesson, we did haunted houses inspired by the art and movies of TIM BURTON! If you'd like to try this lesson, read on!

here's what you will need:
- yellow, purple and orange construction paper
- thin and thick line black pens (sharpies work well, just make sure to put scrap paper underneath kid's work areas... sharpies can bleed through and stain desks!)
- glue sticks
- (optional) a "Principles and Elements of Art" poster
Prep: 
- Cut yellow and orange sheets in half. Students only need half a sheet of one of these colors or their choice. 
Lesson:
- Introduce the principles and elements poster and explain that for each lesson, we will be learning about another principle or element of art.
- Introduce Tim Burton and give a super short bio (wikipedia him!).
-Show slideshow of a few Tim Burton character designs, art and scenes from his movies. Ask students to be thinking about what makes his art look like his art, but hold their comments till the end.
- Ask students what they observed during the slideshow.
- Go back to principles/elements poster and explain how Tim Burton uses "Positive and Negative Space".
Project:
- Talk with students about what makes a house look haunted. (Ex.: pointy shapes, tall and skinny house, ghosts, old and broken looking, etc.)
- Students cut out moon shapes out of their half sheets of orange or yellow paper and glue to the top of their purple sheets.
- Sketch their houses in pencil first
- Small details in skinny black pens, use thicker sharpies to fill in larger areas.
Tim Burton Haunted House kids art project

FOLK ART BLACK CATS
Folk Art Kids Art Lesson
For my 2nd grade October lesson, we did black cats inspired by FOLK ART! If you'd like to try this lesson, read on!

Here's what you will need:
- White paper
- Oil pastels
- Watercolors
Lesson:
- Introduce concept of Folk Art.  (Art that is usually made by indigenous cultures. Rather than “fine art” (art that goes in galleries) It is usually on useful items or for decoration (baskets, on pots, etc.). Usually they are not trying to make things look “real”.)
- Show slideshow of examples of Folk Art from around the world. Ask students to hold their comments till the end.
- Ask students what they observed during the slideshow.
Project:
- Tell students that there are a few rules for this project:
#1 They must draw a border on their pieces.
#2 They must draw the cat inside that border as big as they can fit it.
- Students draw in oil pastels, without coloring everything in.
- Paint over drawings with watercolors.


Folk Art Kids Art Lesson


Tuesday, October 30, 2012

Good news!

I haven't updated this since I was in Philly?! Oops.

First of all, the idea I talked about in my last post is beginning to come together.  I wanted to do a mural on fabric with my students here, ship it over to Madagascar, and have a Peace Corps Volunteer finish it up and install it in their village with their students and/or villagers.  Part International art project collaboration, Part a way to get word out about important topics. (The murals would have to do with Malaria prevention and be mostly visual communication for those who can't read). 

So the update is, I've gotten the "go ahead" from both my old supervisor from Peace Corps Madagascar AND the arts council I work for here.  People have responded really well to the whole thing, so that's exciting!  I've got a few 4th grade classrooms that are interested in being the pilot project!!! AND, a current Peace Corps Volunteer who wants a mural in their village! A perfect match!! Only thing is, the time that the 4th grade staff has available is in early December. That's like, a month away.  And I still have some questions and specifics to work out with the volunteer getting the mural....but they have  sketchy phone service and no internet.  They are relaying messages to and from me, bush-style, by relaying messages to people who know other volunteers who DO have those modern conveniences.  I definitely know what that feels like, and am sympathetic to that.  It's just that I don't have a ton of time to plan this thing.  I want my first project to be PERFECT and GORGEOUS and WORK SMOOTHLY so that it will bring many more murals for Madagascar....or Africa....or even more of the world!!!! ...Someday.

What I think is the strange part is this:

#1: This idea first hit me like a lightning bolt in the middle of the night and energized me like no other.
#2: The perfect match of having a classroom AND a volunteer be ready for it came at about the same time.
#3: The idea for the project logo came to me and got sketched in about 5 minutes. Unusually easy.
#4: I ordered the fabric that we will paint the mural on, experimented with it, and liked it.  But I needed some more.  Without my account being charged, I found another box of the fabric on my doorstep today. Shipped for free, by mistake. 

I think that something out there wants this project to happen and is using me to channel all the creativity and good luck that it can provide.  The universe seems to be on my side.  All good signs that I should pursue it. Cool.

Here is the logo I designed for the project (someday, organization?).  I painted this on some of the fabric we'll paint the murals on. I want to make sure it can adhere to a wall using glue made out of just rice.  Rice is something that Madagascar has PLENTY of, so it would be great to have a glue recipe that's super easy and affordable for people to help them install their murals. We shall see... I'll be making a trip to Eugene's graffiti wall this week with this puppy.  :)


--------------------------------------------------------

In other news, I'm getting my calendar filled out pretty good for teaching this year.  I was hired to teach art lessons for 3rd, 2nd and 1st grades this year at Holt Elementary.  And I have a few school mural residencies booked throughout the Winter and Spring.  While teaching my last lessons with my 3rd graders, something hit me: I get the same "high", happy, fulfilled, joyful feeling from teaching kids art, as I get from painting murals by myself.  Discovering...or rather acknowledging this to myself was really special.  This means, if I can just figure out how to combine BOTH a freelance mural painting business AND being a teaching artist into a full-time gig, I could probably be happy career-wise for my whole life.  That's pretty cool to figure out.  I've struggled so much with trying to find a direction.  It's been stressful and hard.  To just "do art as a career" seems like a direction, but it was too broad and I was scattered and not getting anywhere.  I toyed with trying to become a tattoo artist, an illustrator, a graphic designer, etc etc.  Now, I feel like I know where to put my energy and my motivation and feel that it's right in my heart.  I have a SPECIFIC goal, and it's cleared up my mind a lot and leaving space and energy that I'll need to make it all happen. 

Ok, rambling.... just wanted to share the good news for those of you who were so encouraging about my last post!  Thanks you all for your support.  It means so much, you don't even know!!

Corie